An alternative to purchasing a filter is to create your own. A sump/refugium DIY filtration unit has many benefits. It consumes less energy while in operation, provides a place to hide heaters and protein skimmers (this can greatly improve the appearance of your display tank), increases the water volume in order to dilute undesireable materials in between water changes, helps eliminate nuisance algaes while allowing important macro algaes space and nutrients to grow (pink and purple coraline algae, chaeto, etc.), and creates a space for healthy organisms such as copepods (the primary diet of gorgeous fish such as the Mardarin Dragonet) to thrive.
A DIY sump/refugium consumes less energy because it uses an overflow box that relies on gravity to drain the water into the sump area. Instead of a filter unit that uses energy to suck water out and then pump the water back up into the tank, the sump/refugium unit only needs a pump to return the water. The most important thing to remember when building your own filtration is that you want to amount of water returned to the tank to match the amount being drained (keep in mind that the flow coming out of the pump diminishes depending on the height of the tank).
The sump/refugium is generally divided into three spaces by walls or baffles. The first area is where the water drains down from your display tank. Often times this is the ideal space to store the protein skimmer. The second area is often where the refugium is setup (so long as there isn't heavy flow through the area). This is an excellent place to hide your heater while maintaining a steady temperature throughout your water. The third space is where your return pump goes.
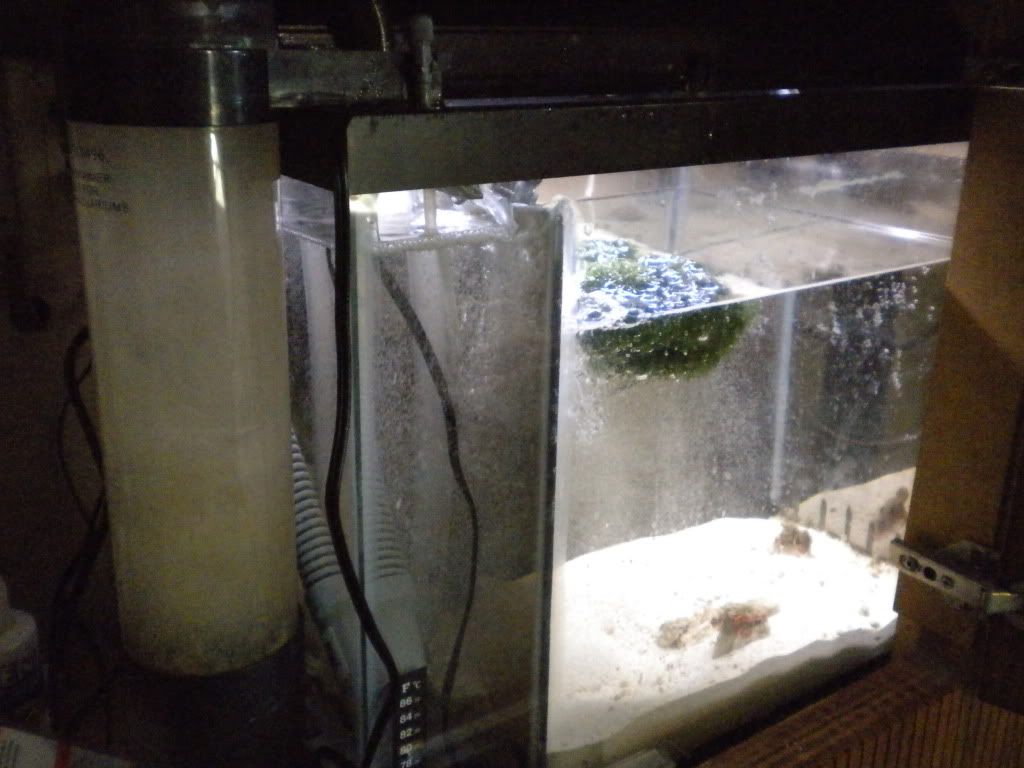
Aside from properly setting up your flow rates, the refugium is the most important part of the setup. A refugium consists of a sandbed, live rock, and macroalgaes. These three things are the major filters for the tank water. Sand and liverock help absorb substances in the water while the macroalgaes use nirates to grow. Macroalgaes are also a breeding ground for pods that benefit the tank and its inhabitants. It is especially important to have a light with a splash guard over the refugium area. Chaeto is a very popular algae to use.
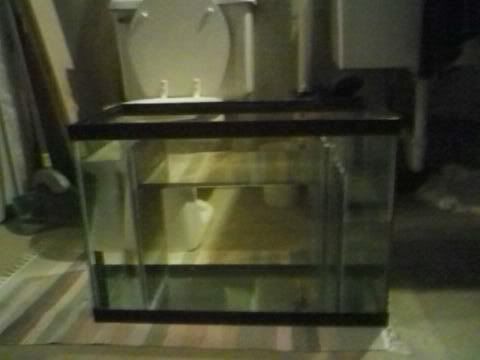
To create my own sump/refugium, I recycled an old 20 gallon tank and some spare pieces of glass. I've seen others use tubs and egg crate to accomplish the same task. Use what you have available to you and you can save money and energy.
 The first step is to measure out the different compartments you need for your sump/refugium. Make sure you leave room for the protein skimmer you intend to use, the return pump, and the refugium (this includes the length of light you are using and the heater if you are going to hide it in this location).
 Pictured Above: These were my initial measurements for my first sump/refugium. Tape worked well to mark where each baffle needed to be placed. I also included a temperature gauge on my sump to ensure stability in several locations. The space for my refugium is much larger than necessary. However, it doubles as a space to store low-light coral frags while I am waiting for them to adhere to their new rock.
 When fixing your walls/baffles to the sides of the tank, it is important to use non-toxic adhesive. Don't forget to double check your measurements before permanently placing them in the sump/refugium. I used blocks of wood to hold the walls in place while the glue dried. I allowed it to dry for over 24 hours. Check the instructions on the adhesive you use to be sure you wait the appropriate time.
 Another important step is to check for any leaks before installing it. Make sure the water flows correctly into each compartment. Be sure that it can handle the water pressure and current that will be passing through it.
 To install, simply place your overflow box in the tank. (Overflow boxes are ideal as drilling a hole for drainage can be both costly and risky to your display tank). Make sure the overflow box is secure. DO NOT START THE SYPHON YET. Place the sump/refugium inside your display stand and bring the drainage tube into the first compartment. Insert your return pump into the appropriate compartment. Bring the return tubing up and secure the return spout on your display tank.
 Place your protein skimmer, light, and heater into the proper compartments. Pour your sand into your refugium area. Slowly add water to the sump/refugium without over filling. There should be enough room left in your sump/refugium that if the power goes out, you display tank has room to drain about 1-2 inches into it without causing it to overflow. (If overfilled, you risk a HUGE mess). Place your live rock and macro algae into the refugium area.
When you have everything in place and plugged in, start the syphon on your overflow box. Depending on the type of overflow box you purchase or create, the syphon process may vary. In most cases, you will have a small flexible tube to slip part way into a larger tube or solid opening. Suck air through the small flexible tube until the syphon begins and then remove it.
Watch carefully as the water drains into your sump/refugium. The water should fully cover the return pump. Ensure that the water is flowing properly from the tank, through the sump/refugium, and back into the display tank. Check it frequently until you are certain the water flow is exact.
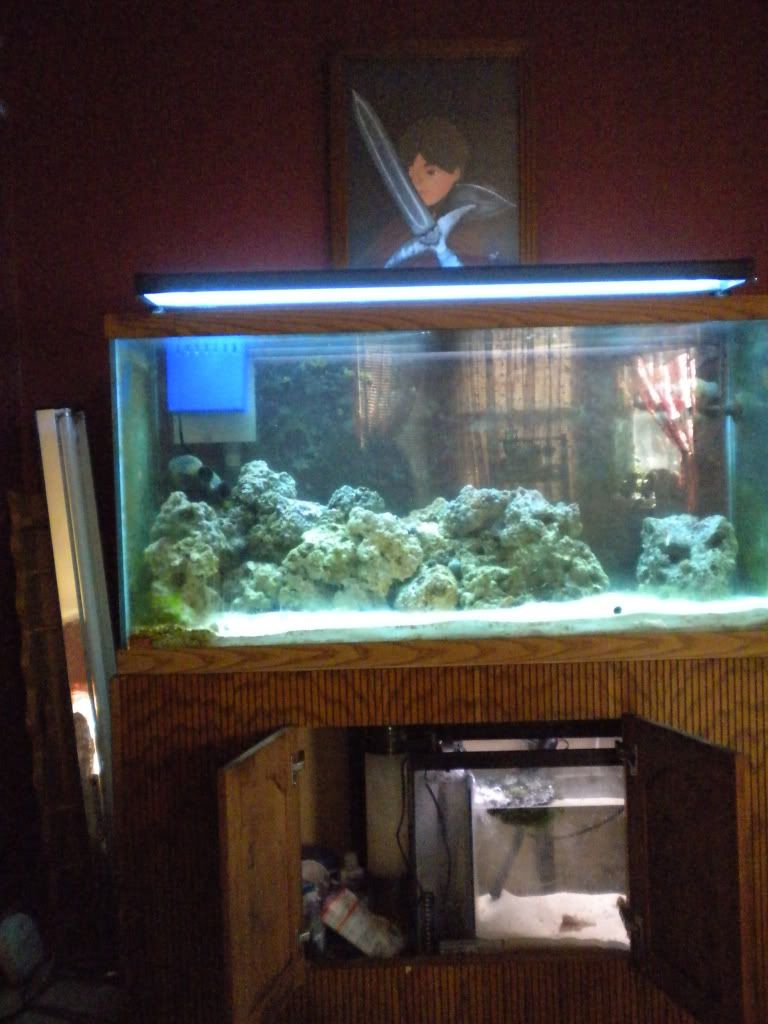
Pictured Above: Hangon Protein skimmer, sump/refugium, sand, and a floating clump of Chaeto macroalgae.
Pictured Below: Halymenia Sp. Macroalgae. Beautiful, fragile, and loved by herbivore fish.

I keep records of my water chemistry tests. After installing my sump/refugium I noticed more stability in my water samples, lower nirate and nirite levels, virtually no ammonia, and a general decrease in stressed fish and corals.
I recommend keeping a record of your own water tests to ensure the health of your aquarium.
Keep in mind: A sump/refugium is just a different type of filter. It DOES NOT replace necessary water changes!
I came across your post while looking for drainage supplies...Glad I did what detailed information on filtration. Freshwater tanks are a breeze compared to marine aqua. Have use everything from diatomics to sponge filtration. Am going togive this a try in the future...........
ReplyDelete